
Deploying Valkey with Docker, Docker-Compose or in the cloud with Sliplane
 Jonas Scholz
Valkey is a data storage system based on Redis, created as an open-source project. It is designed to offer compatibility with Redis while removing some limitations that come from Redis' license and governance. Both Redis and Valkey store data primarily in memory and perform very similarly in speed and functionality.
Valkey vs Redis: what's different?
Valkey started as a Redis fork. Both systems share similar core features such as key-value storage, in-memory caching, persistence options, data structures, and commands.
Main differences include open governance and more permissive licensing in Valkey. It automatically inherits improvements from the Redis core but avoids restrictions imposed by Redis Ltd. Valkey thus offers an open governance structure that makes it appealing to teams who prefer community-driven software alternatives.
Running Valkey with Docker
Docker provides an easy way to run Valkey locally for development or quickly spinning up Valkey on a remote server.
Here's how to run Valkey locally using Docker.
Run Valkey in Docker
To start Valkey, use this Docker command:
docker run --name valkey-server \
  -p 6379:6379 \
  -e VALKEY_PASSWORD=my_password \
  -e VALKEY_DATABASE=0 \
  -v valkey-data:/bitnami/valkey/data \
  docker.io/bitnami/valkey:latest
Explanation of command flags:
--name valkey-server: assigns a recognizable name to your container.-p 6379:6379: makes Valkey accessible on host's port 6379.-e VALKEY_PASSWORD=my_password: sets a password for security.-e VALKEY_DATABASE=0: specifies which database index to use at startup.-v: creates a persistent Docker volume that stores and retains data outside the container.
Running Valkey with Docker Compose
Docker Compose simplifies managing services and related configurations. Create a docker-compose.yml file with these configs:
services:
  valkey:
    image: docker.io/bitnami/valkey:latest
    container_name: valkey-server
    ports:
      - "6379:6379"
    environment:
      - VALKEY_PASSWORD=my_password
      - VALKEY_DATABASE=0
    volumes:
      - valkey-data:/bitnami/valkey/data

volumes:
  valkey-data:
Start with:
docker-compose up -d
Docker Compose manages both your container's lifecycle and data persistence.
Deploy Valkey on Sliplane
Sliplane provides a straightforward way to deploy Docker containers easily in the cloud. Follow these steps to deploy Valkey on your Sliplane server.
Step 1: Select your Server
Log into Sliplane and pick an existing server or create a new one. Ensure the server has enough RAM and disk storage for Valkey.
Step 2: Deploy from Registry
Click on "Deploy from Registry" in Sliplane. It allows deploying apps directly from Docker registries quickly.
Step 3: Use Valkey Docker Image
Enter the Docker image:
docker.io/bitnami/valkey:latest
This pulls Valkey's latest official Docker image.
Step 4: Configure Deployment Privacy
Set your deployment option to private. This restricts the container's external exposure to safeguard your data.
Step 5: Configure Environment Variables
Set these important variables for Valkey:
VALKEY_PASSWORD: create a strong, unique password.VALKEY_DATABASE: set database index (default recommended is0).
This setup will look like this in Sliplane's settings:
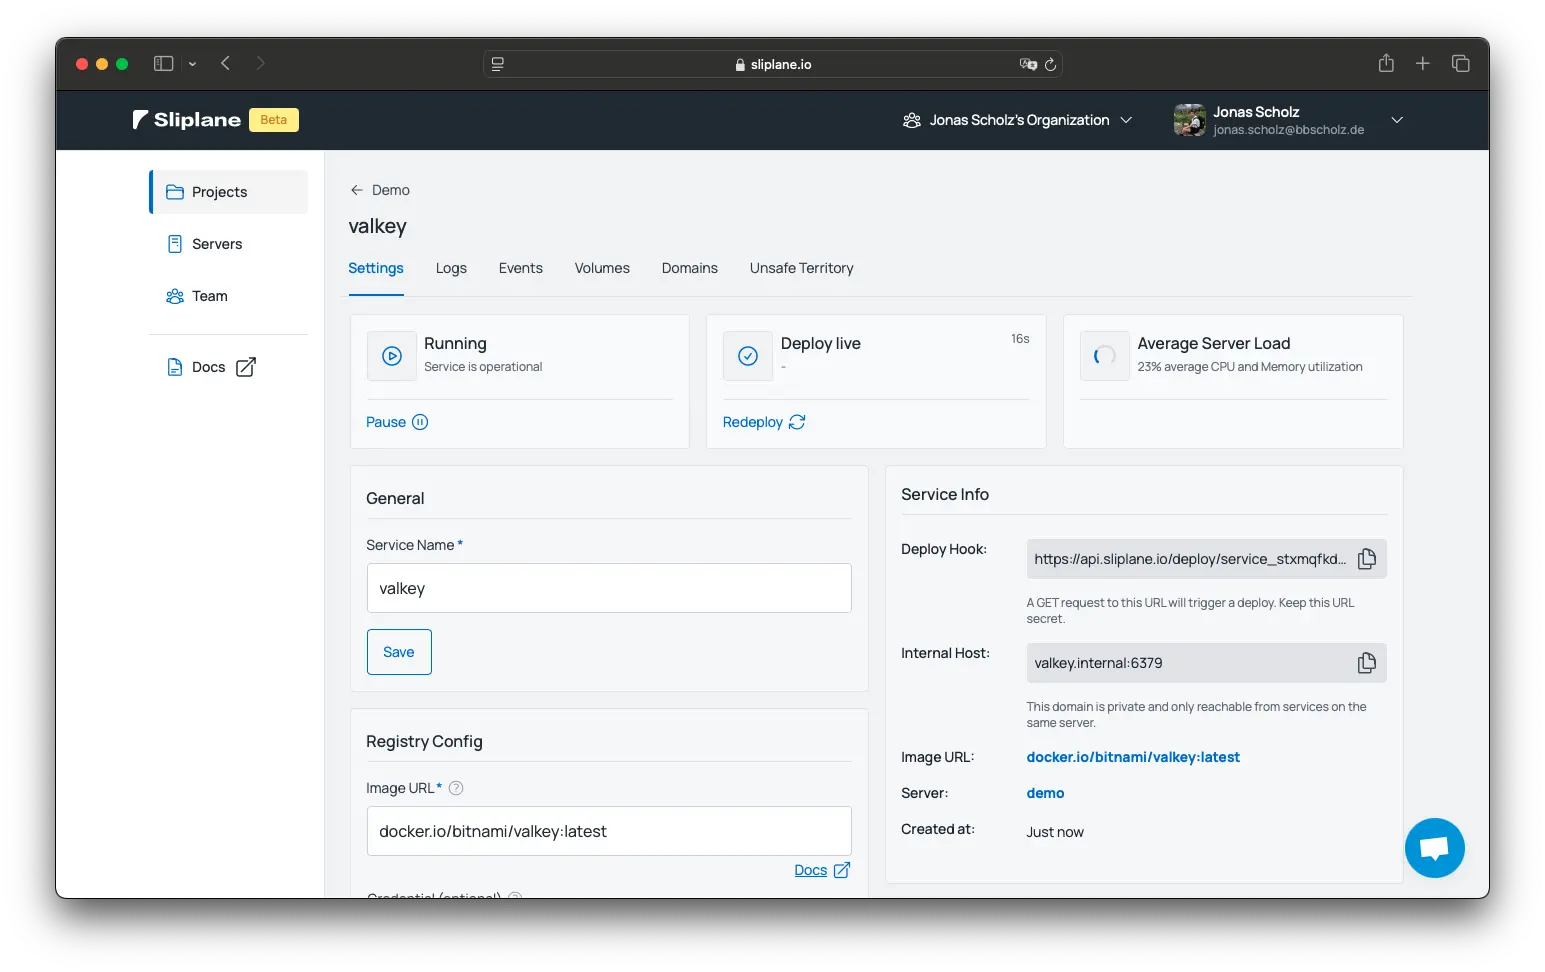
Step 6: Set Up Persistent Storage
Create a storage volume (choose any meaningful name). Mount it to Valkey’s data directory:
/bitnami/valkey/data
Data stored by Valkey remains safe even after restarting or recreating your container.
Step 7: Deploying Valkey
After applying your configuration, click Deploy. Sliplane takes care of pulling the Docker image and starting the container.
Step 8: Check Logs and Connectivity
Check logs in your Sliplane dashboard until it says Valkey is ready. Once ready, grab the internal endpoint from Sliplane, it looks like:
valkey-service.internal:6379
Use that hostname in any applications or services on Sliplane's network to securely connect and interact with your Valkey database.
Testing directly, just connect from within Sliplane via standard Redis-compatible clients or code:
redis-cli -h valkey-service.internal -p 6379 -a your_password
Valkey should respond promptly.
Following these instructions covers fundamental steps for deploying, configuring, and using Valkey efficiently within Docker, Docker Compose, and Sliplane!
Cheers,
Jonas